

How To Check The Size Of A Poster In Powerpoint
Creating a enquiry affiche in PowerPoint is a multistep procedure. These tips volition help you produce a high-quality poster for your presentation or event. Notation: In one case y'all have created and spellchecked your poster, salvage your PowerPoint file every bit a PDF for file submission and printing.
Things to consider before start
What size is the poster?
PowerPoint places a limit on the dimensions of slides; if you lot plan on printing a poster that has dimensions larger than 56″ yous will need to create it with some other slice of software similar Photoshop or InDesign.
How much does a poster cost?
Get an estimate using the toll calculator.
Where are the images coming from?
Images copied from the web are depression resolution (72 dpi) and are not good quality for a printed poster. Minimum image resolution should be 150 dpi at actual printing size for best results.
What is the borderline?
Posters are printed Monday through Fri with a standard 24-hour turnaround time. Programme ahead to avoid high volume times for quicker turnaround.
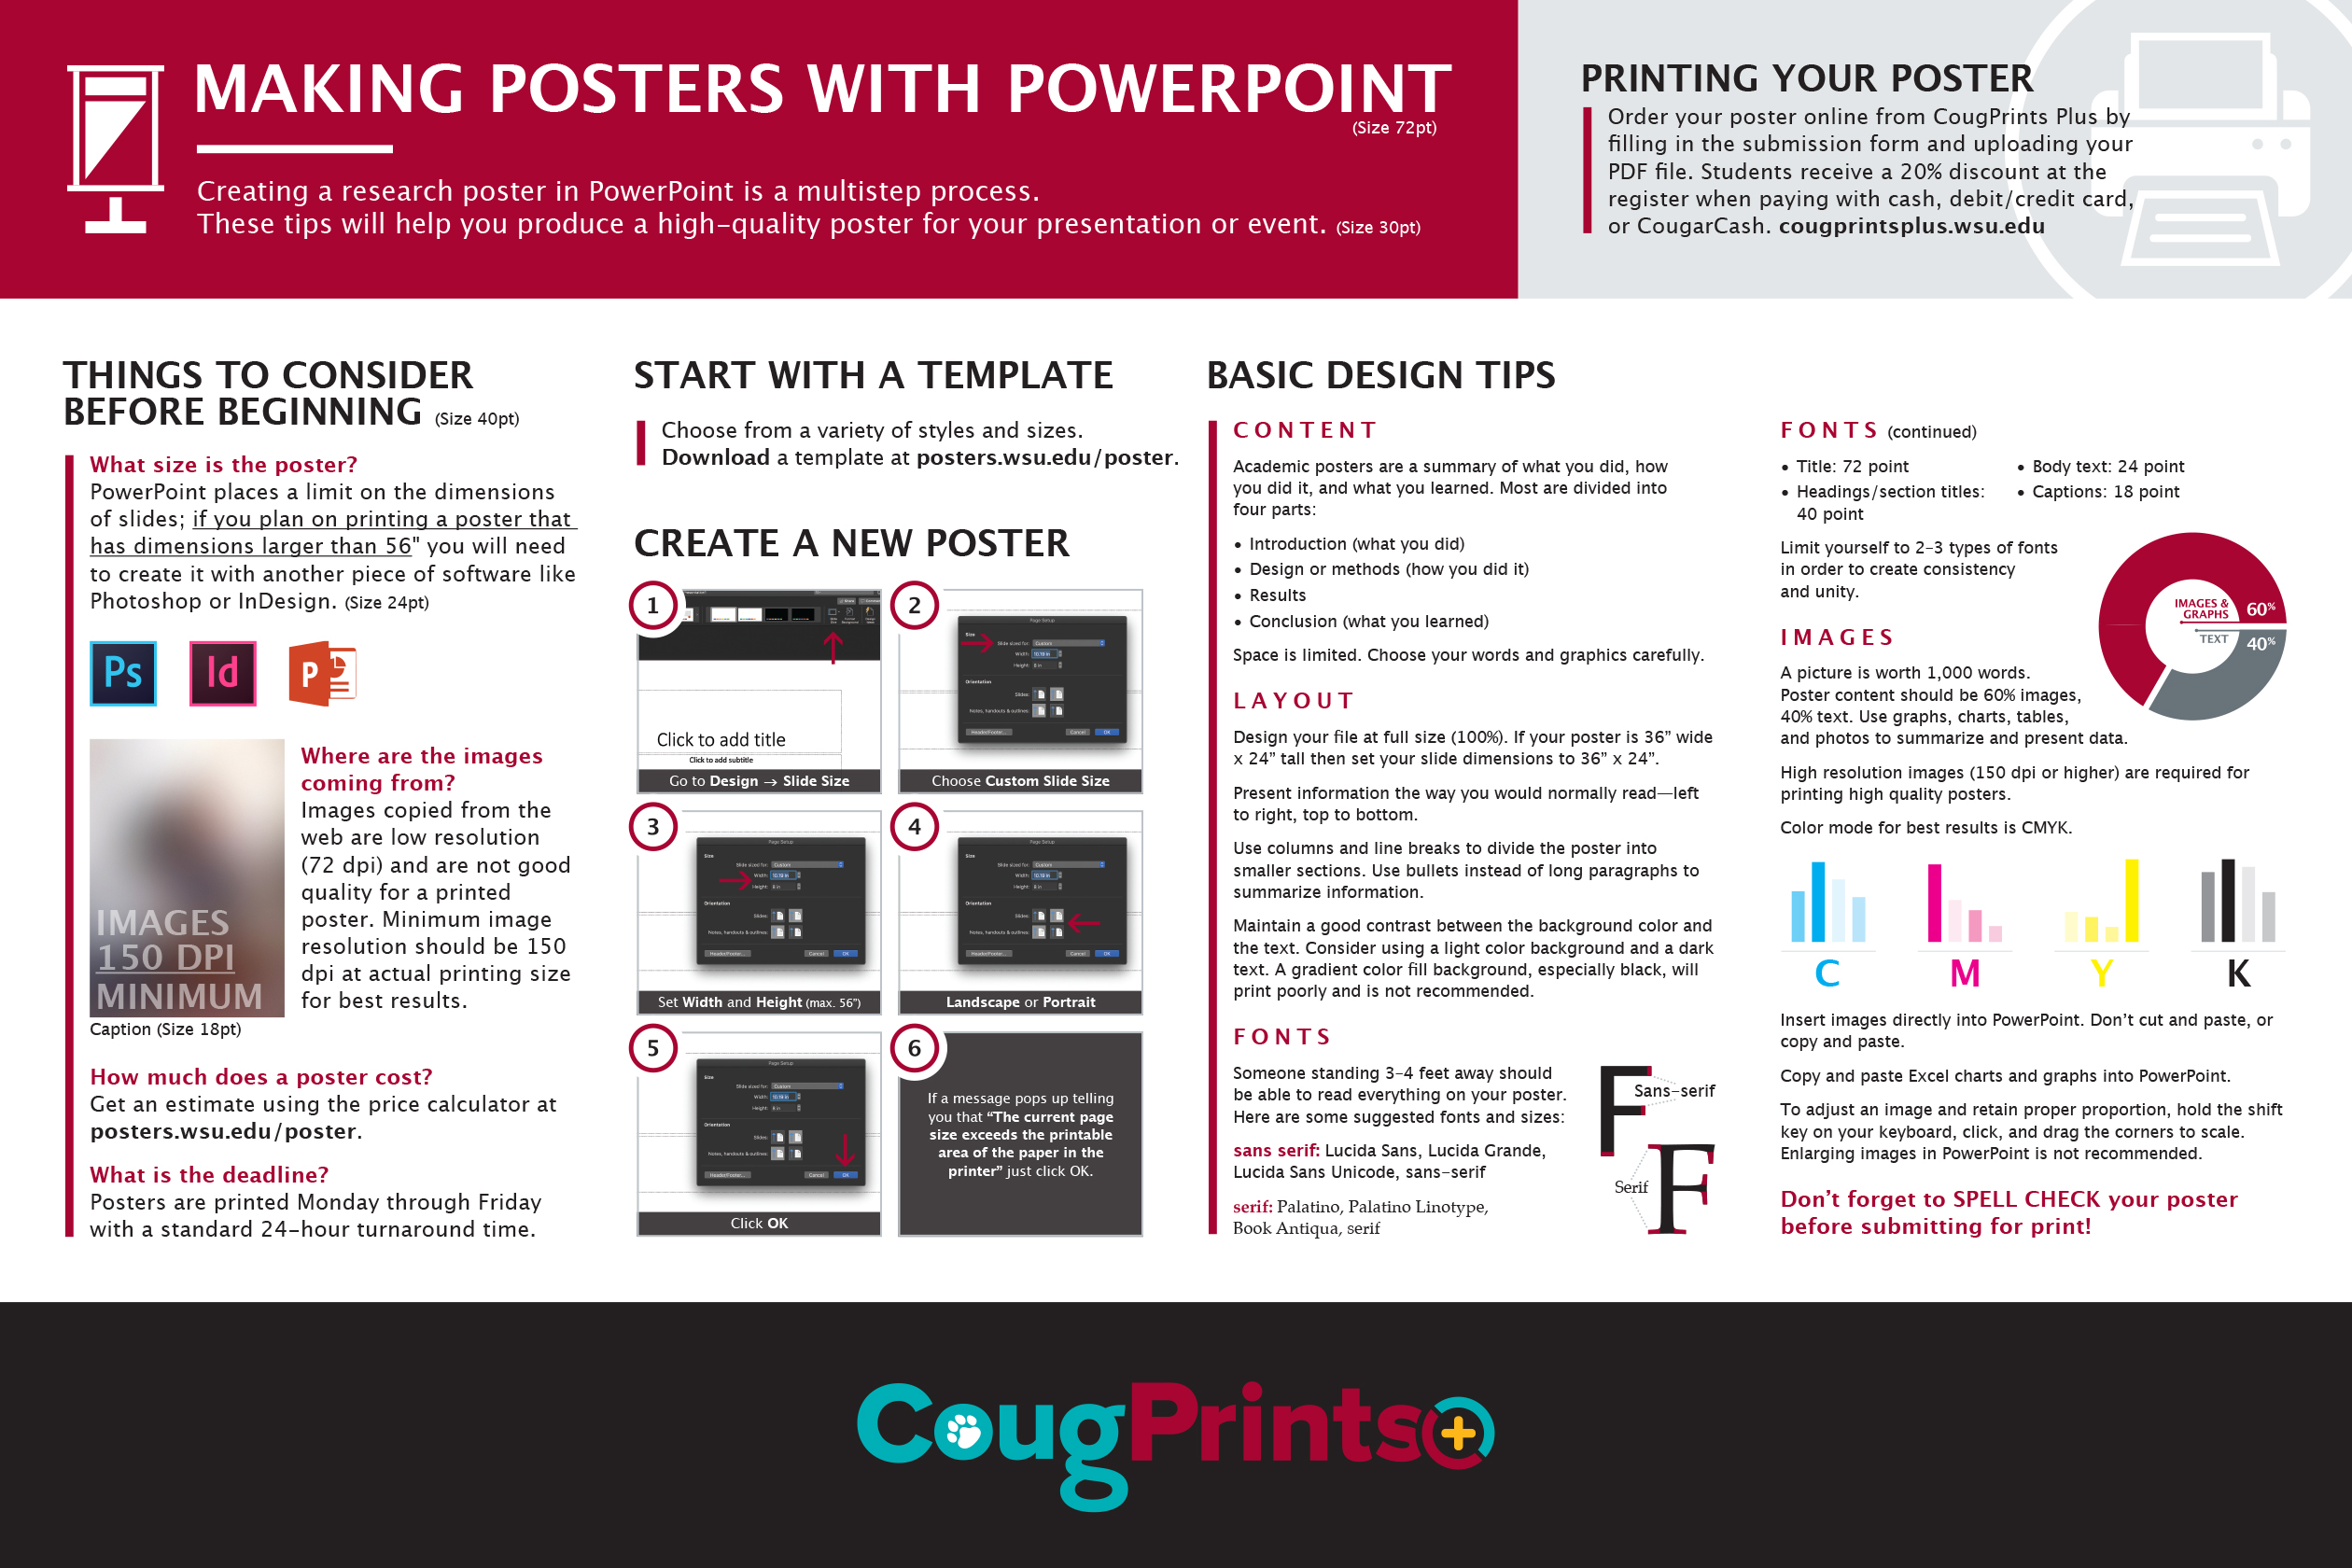
Create a new poster
Open up a new document in PowerPoint.
- Go to Blueprint –> Slide Size
- CullCustom Slide Size
- SetWidth andElevation (max. 56″)
- Choose theLandscape (horizontal) or Portrait orientation.
- ClickOK.
- If a bulletin pops up telling you that "The electric current page size exceeds the printable surface area of the paper in the printer" simply clickOK.
Basic design tips
Content
Academic posters are a summary of what you did, how y'all did it, and what you learned. Most are divided into four parts:
- Introduction (what you lot did)
- Design or methods (how y'all did information technology)
- Results
- Determination (what yous learned)
Space is limited. Choose your words and graphics advisedly.
Don't forget to SPELL Check your poster before submitting for impress!
Layout
Blueprint your file at total size (100%). If your poster is 36″ wide x 24″ tall then set your slide dimensions to 36″ x 24″.
Present data the way you would unremarkably read—left to right, summit to bottom.
Use columns and line breaks to divide the poster into smaller sections. Use bullets instead of long paragraphs to summarize information.
Maintain a skilful contrast betwixt the groundwork colour and the text. Consider using a low-cal color background and a dark text. A slope color fill groundwork, peculiarly black, volition print poorly and is not recommended.
Fonts
Someone standing 3–4 feet away should be able to read everything on your poster. Here are some suggested fonts and sizes:
Sans serif: Lucida Sans, Lucida Grande; Serif:Palatino, Volume Antiqua
- Title: 72 bespeak
- Headings/section titles: 40 point
- Body text: 24 point
- Captions: 18 point
Limit yourself to two–3 types of fonts in social club to create consistency and unity.
Images
A picture is worth 1,000 words. Poster content should be lx% images, 40% text. Utilise graphs, charts, tables, and photos to summarize and nowadays data.
Loftier resolution images (150 dpi or higher) are required for press loftier quality posters.
Color mode for best results is CMYK.
Insert images straight into PowerPoint. Don't cut and paste, or copy and paste.
Re-create and paste Excel charts and graphs into PowerPoint.
To arrange an image and retain proper proportion, hold the shift cardinal on your keyboard, click, and drag the corners to scale. Enlarging images in PowerPoint is non recommended.
Printing your poster
Club your poster online from CougPrints Plus by filling in the submission form and uploading your PDF file. Pick upwardly and pay for posters at CougPrints Plus in the CUB.
Place your poster order!

How To Check The Size Of A Poster In Powerpoint,
Source: https://posters.wsu.edu/making-posters-with-powerpoint/
Posted by: richardscier1983.blogspot.com
0 Response to "How To Check The Size Of A Poster In Powerpoint"
Post a Comment